“再”学习不一样的Vue:布局与组件
前言
学习Vue的过程中,看完 Vue.js 官网的基础知识,特别想要找一个项目练练手。看到了杨怡的教程《学习不一样的Vue》,github上 vue-todos 标星1.5k,动手实践的过程中,碰到了各种问题,故此记录下学习的过程。
源地址
- 首发博客: yangyi1024
- 项目源码: 源码
- 项目预览: 预览

开始搭建
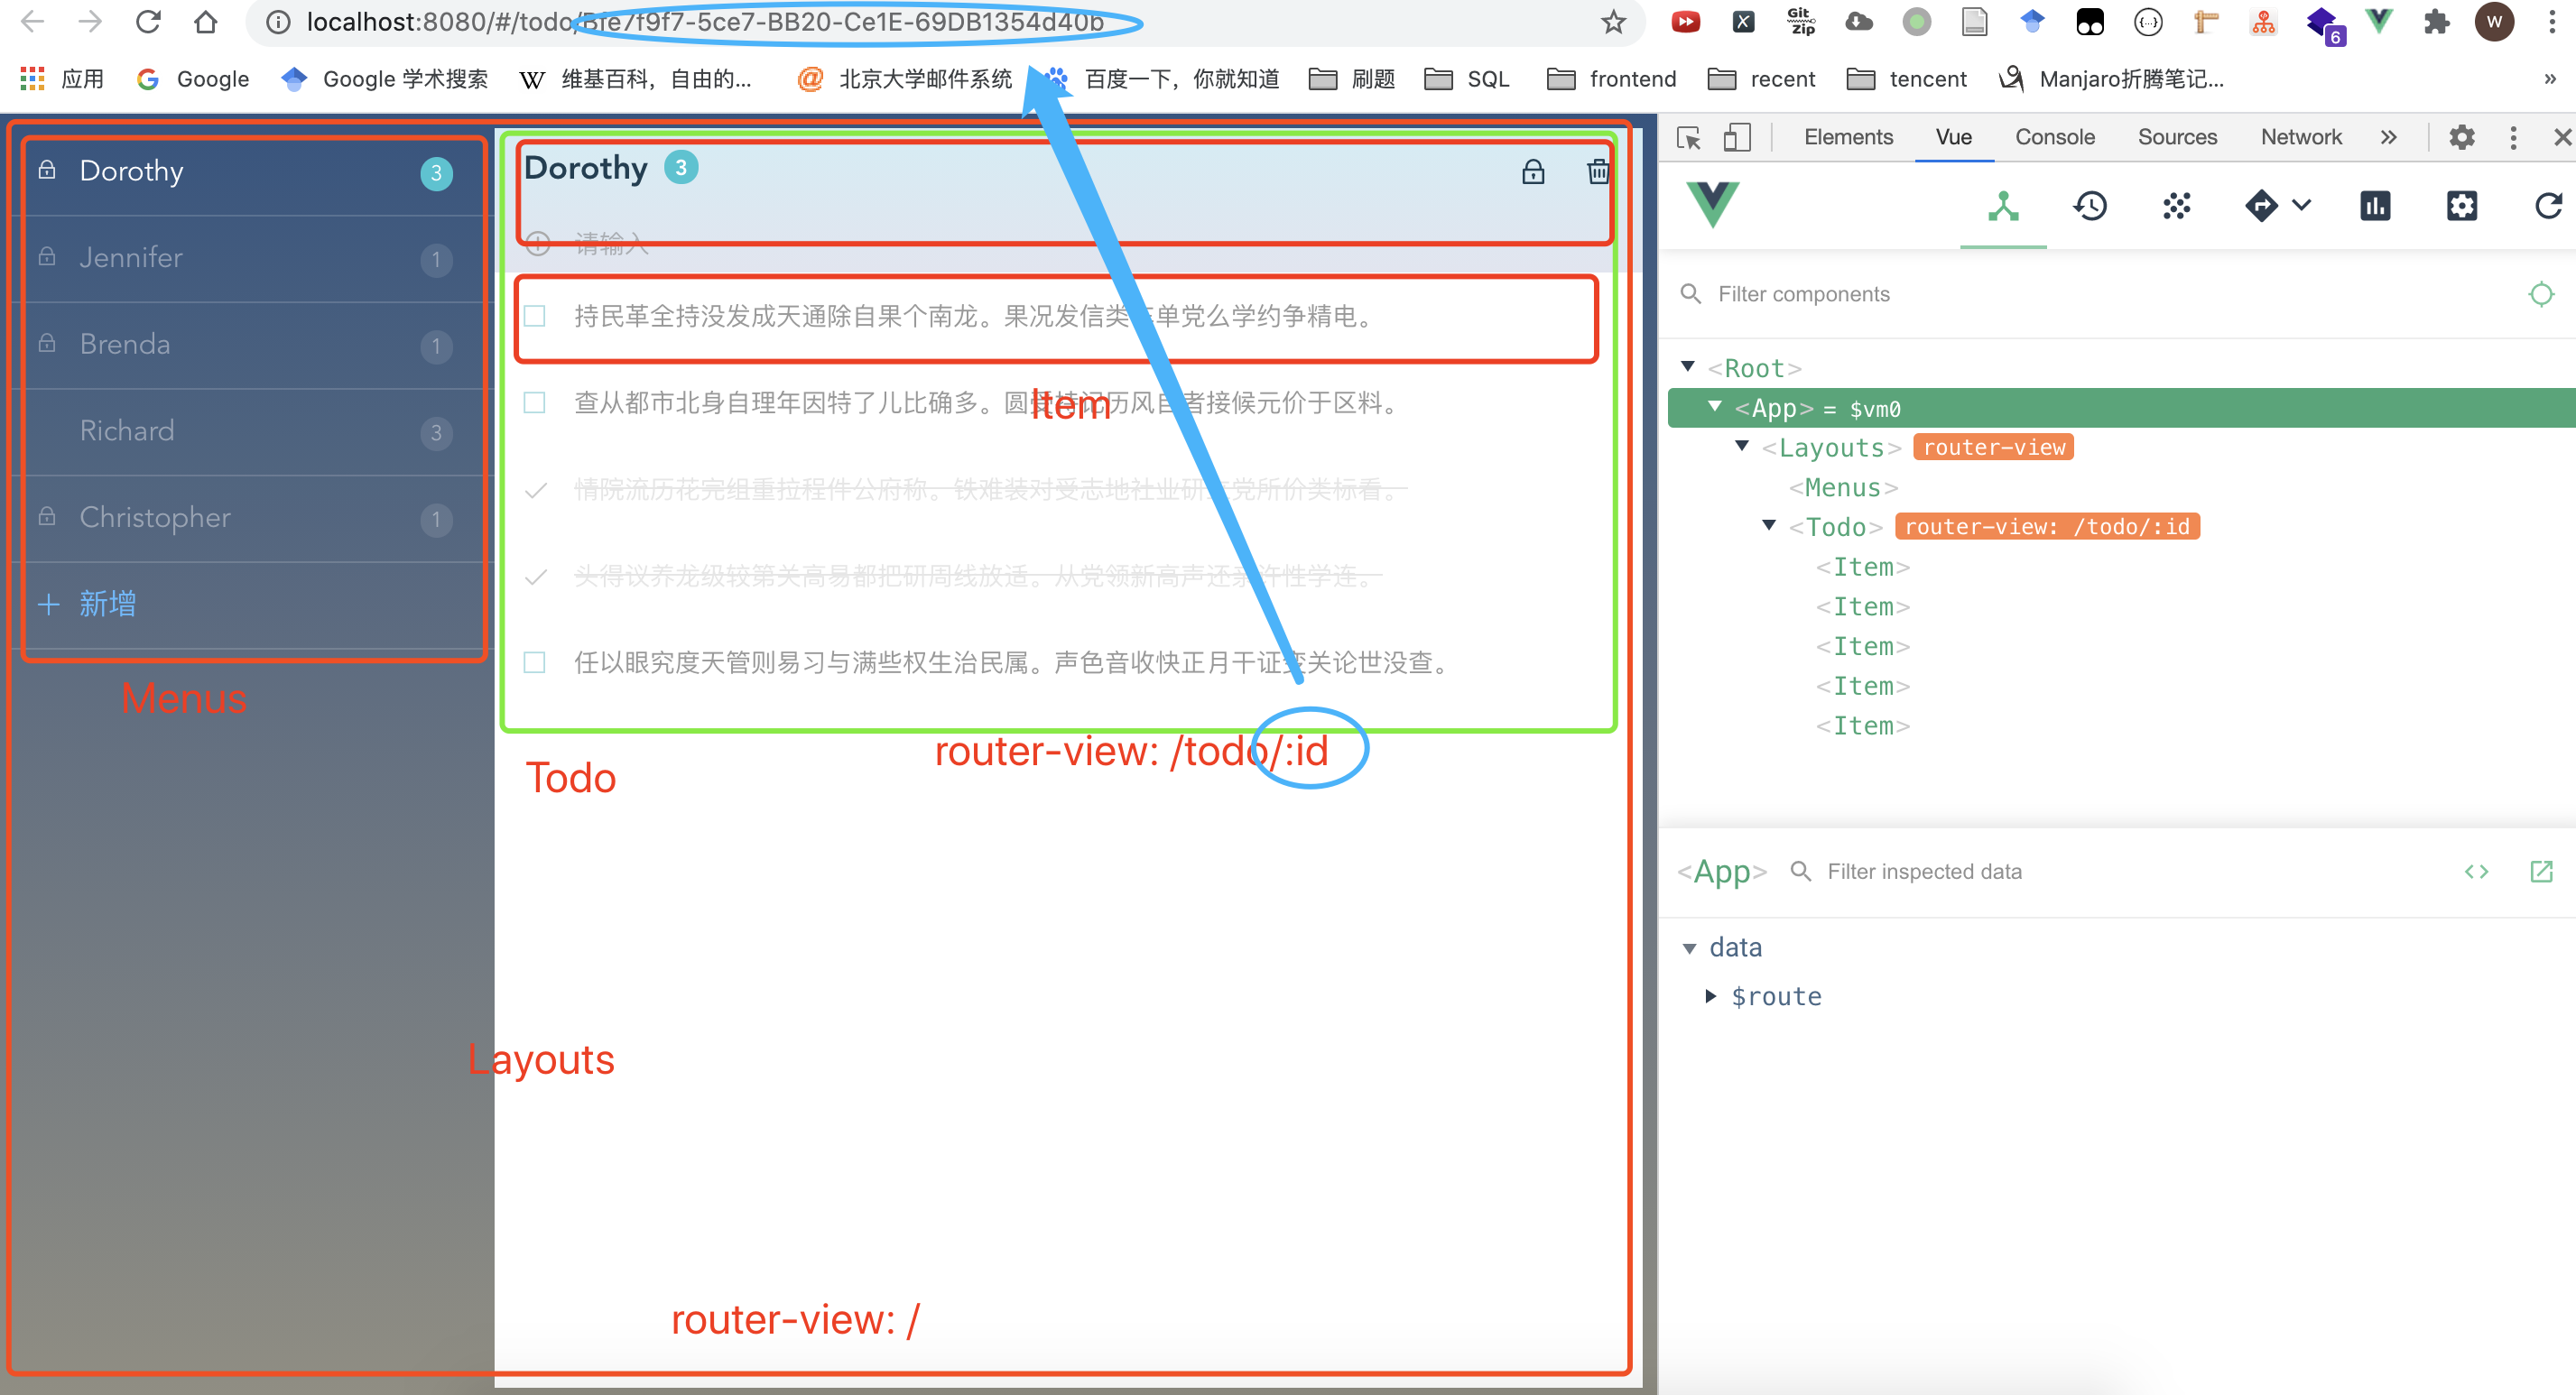
需要哪些组件
通过 学习不一样的vue(2):项目分析 我们知道了需要的组件需求
app.vue   // 最外层根组件 接入型
layouts.vue  // 布局组件  接入型 接入其他组件
menus.vue  // 左侧列表    交互型组件
item.vue  // 右侧内容    交互型组件
todo.vue  // 待办单项组件   交互型组件

入口文件 main.js
这一部分的内容并不是属于 vue 的知识点,webpack 会读取 main.js 作为项目的入口文件。由于我们使用 vue-cli 封装了 webpack, 所以其实是 vue-cli-service 会调用这个入口文件
import Vue from 'vue'  //引入vue模块
import App from './App.vue' //引入vue组件
import router from './router' // 引入路由配置文件
import store from './store' // 引入 vuex

Vue.config.productionTip = false // 关闭生产模式下给出的提示

new Vue({ // 创建一个 Vue 的根实例
  router, // 注入路由配置。
  store, // 注入vuex
  render: h => h(App) // 渲染根模板
}).$mount('#app') // 注入组件
从 package.json 可以看出,我们是由 vue-cli-service 启动服务
// package.json
...
"scripts": {
    "serve": "vue-cli-service serve",
    "build": "vue-cli-service build"
  },
...
那么我们应该如何配置入口文件呢?还记得上节说的 vue.config.js 吗,参考 官网API,发现 pages 可以设置。除了 entry 都是可选的。
module.exports = {
pages: {
index: {
// page 的入口
entry: 'src/index/main.js',
// 模板来源
template: 'public/index.html',
// 在 dist/index.html 的输出
filename: 'index.html',
// 当使用 title 选项时,
// template 中的 title 标签需要是 <title><%= htmlWebpackPlugin.options.title %></title>
title: 'Index Page',
// 在这个页面中包含的块,默认情况下会包含
// 提取出来的通用 chunk 和 vendor chunk。
chunks: ['chunk-vendors', 'chunk-common', 'index']
},
// 当使用只有入口的字符串格式时,
// 模板会被推导为 `public/subpage.html`
// 并且如果找不到的话,就回退到 `public/index.html`。
// 输出文件名会被推导为 `subpage.html`��。
subpage: 'src/subpage/main.js'
}
}
复制静态文件 common/assets
由于我们的目的是学习 Vue,暂时忽略 CSS 的用法
复制 src 下的 assets 和 common 文件,为后续引入使用做准备
修��改App.vue 根组件
<template>
  <div id="app">
    <!-- 使用路由模式 -->
    <router-view></router-view>
  </div>
</template>

<script>
export default {
  name: 'app'
};
</script>

<style>
#app {
  font-family: 'Avenir', Helvetica, Arial, sans-serif;
  -webkit-font-smoothing: antialiased;
  -moz-osx-font-smoothing: grayscale;
  text-align: center;
  color: #2c3e50;
  margin-top: 60px;
}
</style>
知识点:.vue 文件
Vue 自定义了一种后缀名名字为.vue文件,它将html, js, css 整合成一个文件,和里面 template script style三个区别分别依次对应。
这个对应的是 单文件组件 的知识点,下面是一个简单的例子
<template>
  <!--这里写 html -->
  <p>{{ greeting }} World!</p>
</template>

<script>
module.exports = {
  // 这里写js
  data: function() {
    return {
      greeting: "Hello"
    };
  }
};
</script>

<style scoped>
<!--这里写 css -->
p {
  font-size: 2em;
  text-align: center;
}
</style>
注意点:
- 由于 游览器 并不能识别
.vue文件,若是要对其解析,webpack构建中,需要使用 vue-loader进行解析。- scoped 指这里写的css只适用于该组件。
新增common/layouts.vue(布局组件)
<template>
  <section class="container">
    <!-- 左侧菜单 -->
    <section class="menu">
      <menus></menus>
    </section>

    <!-- 右侧列表部分交给路由 -->
    <div class="content-container">
      <router-view></router-view>
    </div>
  </section>
</template>

<script>
import menus from './menus';
import todo from './todo';
export default {
  components: {
    menus,
    todo
  }
};
</script>

<style lang="less">
@import '../common/style/layouts.less';
</style>
修改 src/router/index.js (路由)
import Vue from 'vue'
import VueRouter from 'vue-router'
import layouts from '@/components/layouts';
import todo from '@/components/todo';
// webpack 的 alias, @ 代表的是 src 文件夹
Vue.use(VueRouter)

const routes = [
  {
    path: '/',  // 根路由
    name: 'Home',
    component: layouts,
    children: [{
      path: '/todo/:id',
      name: 'todo',
      component: todo // 子组件
    }]
  }
]

const router = new VueRouter({
  routes
})

export default router
知识点:命名路由
命名路由 的使用方法是
const router = new VueRouter({
  routes: [
    {
      path: '/user/:userId',  // 使用命名路由
      name: 'user',
      component: User
    }
  ]
})
链接到一个命名路由的两种方式
<router-link :to="{ name: 'user', params: { userId: 123 }}">User</router-link
router.push({ name: 'user', params: { userId: 123 }})
新增src/common/menus.vue
这里我们只写 html 和 css 的部分
<template>
  <!--绑定点击事件goList),并且判断当todoId 时候 item.id时,文字高亮度-->
  <div class="list-todos">
    <!-- 绑定class,当items循环中的id等于我们设置的选中todoId时候,就会加上active这个calss,这样样式就会发生变化。-->
    <a @click="goList(item.id)" class="list-todo list activeListClass" :class="{'active': item.id === todoId}" v-for="(item,index) in items" :key="index">
      <!-- 把以前的item换成todoList -->
      <span class="icon-lock" v-if="item.locked"></span>
      <span class="count-list" v-if="item.count > 0">{{item.count}}</span>
      {{item.title}}
    </a>
    <a class=" link-list-new" @click="addTodoList">
      <span class="icon-plus">
      </span>
      新增
    </a>
  </div>
</template>

<script>
export default {
  data() {
    return {
      items: [
        { title: '星期一', count: 1, locked: true , id: 'a'},
        { title: '星期二', count: 2, locked: false, id: 'b'},
        { title: '星期四', count: 3, locked: true, id: 'c'},
      ], // 菜单数据
      todoId: '', // 默认选中id,
      todoNum: 0 // 新增一个状态来判断代办事项的数据
    };
  },
  methods: {
    goList(id) {}, // 选中菜单,切换视图
    addTodoList() {} // 新增菜单
  }
};
</script>

<style lang="less">
@import '../common/style/menu.less';
</style>
新增 src/common/item.vue
item 暂时空着不写
<template>
</template>

<script>
</script>

<style>
</style>
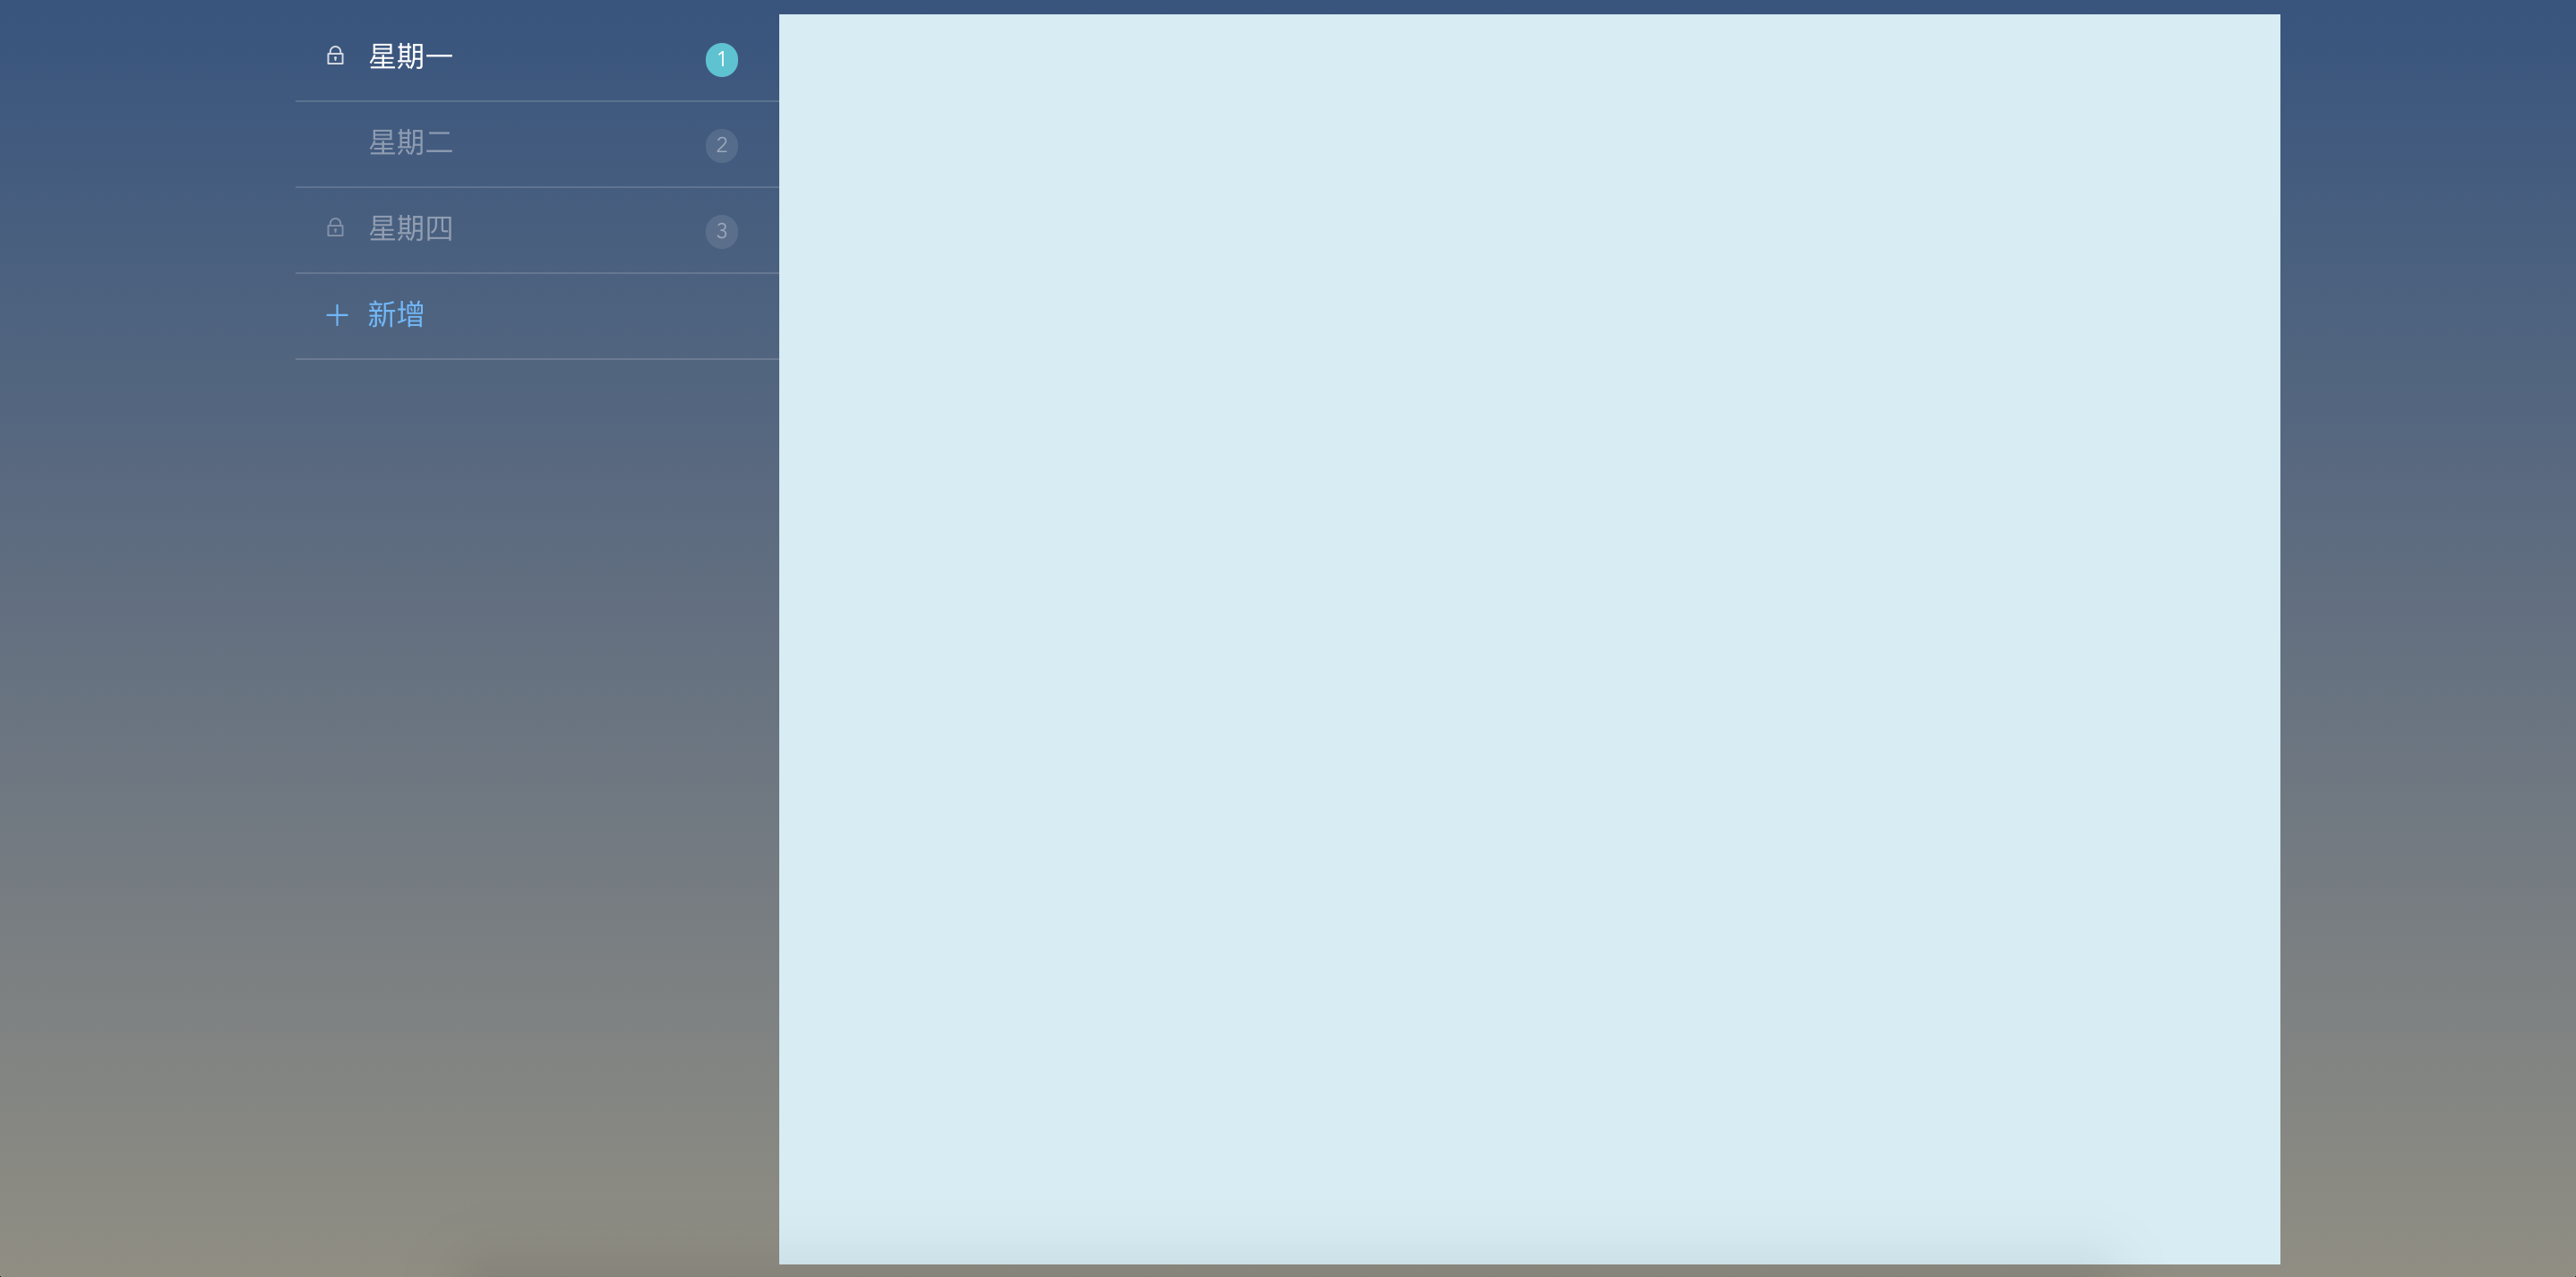
运行程序
$ npm run serve

如果出错的话,需要注意是不是依赖没有成功安装,这里重点看一下 less 和 less-loader 是不是成功安装
// package.json
...
"dependencies": {
    "core-js": "^3.6.5",
    "vue": "^2.6.11",
    "vue-router": "^3.2.0",
    "vuex": "^3.4.0"
  },
  "devDependencies": {
    "@vue/cli-plugin-babel": "~4.5.0",
    "@vue/cli-plugin-router": "~4.5.0",
    "@vue/cli-plugin-vuex": "~4.5.0",
    "@vue/cli-service": "~4.5.0",
    "less": "^3.0.4",
    "less-loader": "^5.0.0",
    "vue-template-compiler": "^2.6.11"
  },
...
我的仓库
这里,我将学习过程同步到 我的仓库 中
$ git add -A
$ git commit -m "“再”学习不一样的Vue:布局与组件"
# 强制同步
$ git push -f https://github.com/PPsteven/vue-todos-exercise.git master